How to enable Google Adsense Monetization on Blogger Blogspot site?
If you own a blog site on Blogger which is gaining views, you might want to monetize it. In that case, you may follow the steps below. Since Blogger is a Google Product, the steps to integrate Google Adsense with Blogger is fairly much simpler.
Before you apply for Google Adsense monetization for your Blogger blogspot site, make sure you are eligible. Learn more about how to qualify for Adsense here (Eligibility requirements for AdSense).
Enabling Google Adsense monetization on your blog depends on two things.
1) Whether you are freshly applying for Google Adsense monetization
2) Whether you already have a Google Adsense approved and want to link to this Blogger blog site.
Steps to enable monetization on Blogger Blogspot site:
- Sign in to your Blogger account.
- Select the blog you want to monetize from the Dashboard.
- Click on the “Earnings” tab in the left menu.
If your blogs is already connect to Adsense, then you will see details like this:
Your blog is connected to AdSense.
Your AdSense account is active and connected to your blog. To view details of your earnings visit AdSense.
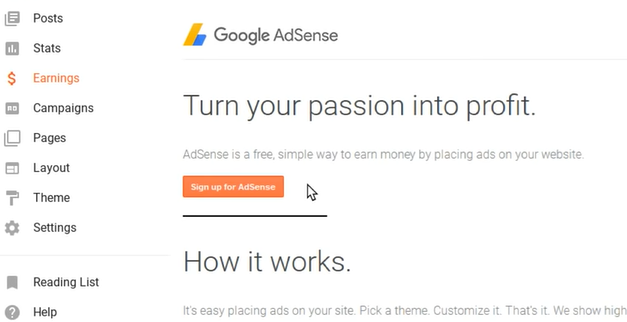
If not already connected, then you will see “Sign up for Adsense”.
- Click on the “Sign up for AdSense” button to create a new AdSense account or link an existing one.
In the following page, Blogger will tell you that you have signed in with so-and-so account.
You can continue with the existing Google Account with which you have logged in to Blogger. In that case, click “yes“.
If not, click on “Create or Use another account“.
- Click NEXT.
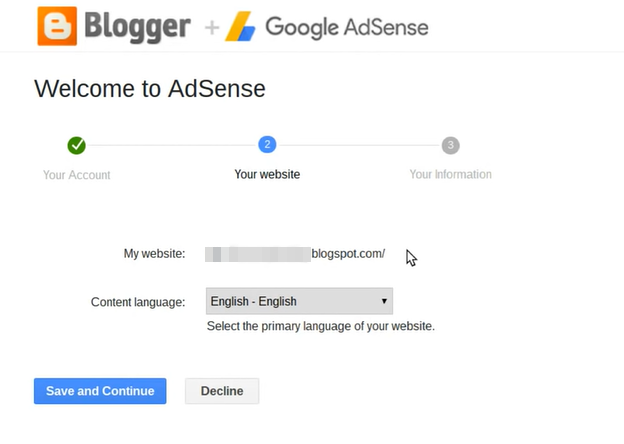
- In the next screen, your Blogger blog site address is displayed.
- Click SAVE and CONTINUE to confirm.
- The next page will ask you to fill in your personal information.
- Fill in your personal information asked and continue.
- Once you submit, it will be reviewed by Google Adsense. You need to wait for approval.
- In the mean time, you need to customize the Adsense display and format suitable for your blog.
- Click on EARNINGS > Enable “Show Ads on blog” = YES.
- Also choose a suitable ad positioning
- If you desire, you can click on ” Customize further in Advanced Ad Setup” to go to LAYOUT and configure the ad layout further.
- In the layout page, you can click on the EDIT (pencil) icon for BLOG POST gadget, and enable “Show ads between posts“.
- You can set “Show after every ___ posts”.
- Select ad format / sizes.
- Select ad template.
- You can also add an Adsense gadget to regions on your Blogger site
- From the Blogger dashboard, click on LAYOUT menu on the left
- Click on ADD A GADGET link available in a particular region. Suppose we want to add an Adsense gadget in the sidebar. Then click on the ADD A GADGET link.
- Find Adsense Gadget and click on the + sign
- Select size, format and appearance template for the Google Adsense
- Click SAVE to add the Adsense gadget to the blog
- From the Blogger dashboard, click on LAYOUT menu on the left
Note that you need to comply with AdSense policies and guidelines to maintain your monetization eligibility. Additionally, your earnings depend on factors such as your traffic, ad placement, and ad relevance, among others.
Placing Google Adsense ads on your Blogger/Blogspot site after Google Adsense approval
Once your Google Adsense account is approved, you can also get Adsense code from Google Adsense and place it in your site manually wherever necessary.
To place Google Adsense code manually,
From the Blogger dashboard, click on LAYOUT menu on the left
Click on ADD A GADGET link available in a particular region. Suppose we want to add an Adsense gadget in the sidebar. Then click on the ADD A GADGET link.
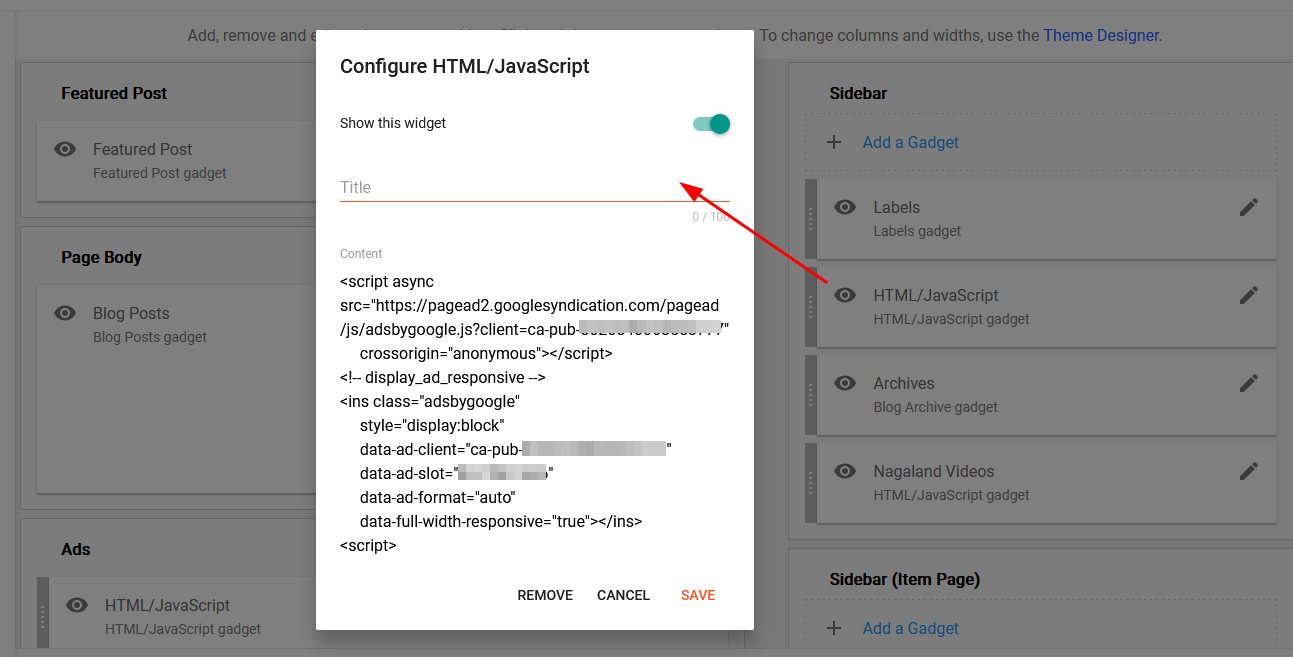
Find HTML/JAVASCRIPT Gadget and click on the + sign
Place the Google Adsense code and save it
Alternatively, you can also enable Google Adsense auto ads to let Google Adsense automatically place ads for you on your website.
Set up an ads.txt file (important if you also serve ads from another ads network)
If your blog is also monetized with third-party as networks beside Google Adsense, or you’ve manually integrated AdSense in your blog, you need to manually set up the content of the ads.txt file.
- Sign in to Blogger.
- Select the concerned blog from the top site menu
- From the menu on the left, click Settings.
- Look for “Monetization,” section and turn on Enable custom ads.txt.
- Click Custom ads.txt.
- Copy the settings from your third-party monetization provider and paste them in the text box.
- Click Save.

Tip: To check the content of your ads.txt file, go to http://<your blog address>/ads.txt.
If you want to enable Google Adsense monetization on your Blogger site, follow the steps above. Once your Google Adsense is approved for the site, then ads should start appearing on your Blogger blogspot site.
